These documents describe how to build 3D Forest and develop new plugins using APIs in 3D Forest and other libraries.
Git
Get the Source Code
  git clone https://github.com/VUKOZ-OEL/3d-forest.git
  cd 3d-forest
Create New Branch
- If you like to make some changes, then create your branch in GitHub:
- Open web page 'https://github.com/VUKOZ-OEL/3d-forest'.
- Click on 'main' button.
- In 'Switch branches/tags' popup window:
- Select field 'Filter branches/tags':
- Type a name of your-branch. Example "vb" for "Vaclav Bubnik".
- Hit enter.
Merging Your Changes
- Switch to your branch if you like to make some changes:
git checkout your-branch
- Merging 'main' into your branch is required before making contribution from your branch. Merging from 'main' may result to some unfortunate merge conflicts which are resolved manually.
  # Push your current changes in your branch if you have any (git status)
  git add --all
  git commit -m "Update"
  git push

  # Checking latest changes in 'main'
  git checkout main
  git fetch
  git pull

  # Merging 'main' into your branch
  git checkout your-branch
  git merge --no-ff -m "Merge branch 'main' into your-branch" main

  # Resolve conflicts and push
  git push

  # Merging your branch into 'main' (contribution, pull requests later)
  git checkout main
  git merge --no-ff -m "Merge branch 'your-branch' into main" your-branch
  git push

  # Return to your branch
  git checkout your-branch
Commands
- Common download sequence:
  git checkout <branch>
  git fetch
  git pull
- Common upload/backup of your local changes to GitHub:
  git branch
  git status
  git add <path>
  git add --all
  git commit -m "Add feature x"
  git push
Build from Source Code in Linux with "Unix Makefiles"
The code uses C++17, CMake, Qt5/Qt6 and OpenGL which will be installed in the following steps. Qt and OpenGL are required only for GUI desktop application.
Install Packages
- Updating APT Packages
$ sudo apt update $ sudo apt upgrade - Installing Virtual Machine Tools [Optional]
$ sudo apt install open-vm-tools-desktop
- Installing Additional Tools: C/C++ development
$ sudo apt install build-essential
- Installing Additional Tools: GUI development with OpenGL 3D graphics library
$ sudo apt install mesa-common-dev libgl1-mesa-dev $ sudo apt install libxkbcommon-dev libxkbfile-dev - Installing Additional Tools: CMake and GIT
$ sudo apt install cmake $ sudo apt install git - Installing Required Libraries for Qt Installer [May not be necessary]
    $ sudo apt install libxcb-cursor0 libxcb-cursor-dev
    $ sudo apt-get install libxcb-xinerama0
Install Qt
- Download Qt installer from https://www.qt.io/download
- Click the "Downloads for open source users" button under "Go open source"
- Click the "Download the Qt Online Installer" button in the bottom section of the "Looking for Qt binaries" page
- The recommended download is usually "Qt Online Installer for Linux (64-bit)"
- The "Download" button saved the file as "qt-unified-linux-x64-4.6.0-online.run"
- Run the installer
- You may need to check the "Make file executable" option in the file properties of the downloaded file
- Opening qt-unified-linux-x64-4.6.0-online.run will display the "Qt Setup" window
- Enter your Qt Account email and password, then click "Next"
- Check the boxes for "I have read" and "I am an individual person," then click 'Next'
- Click "Next"
- "/home/user/Qt" is the default directory where Qt will be installed
- Select "Custom installation", then click "Next"
- The current installer allows you to install Qt versions from 6.5.3 to 6.8.0. Older versions like Qt 5.15.0 are available by selecting the "Archive" checkbox.
- Click "Deselect All" button if you do not need Qt Design Studio etc.
- Check: Qt - Qt 6.8.0 - Desktop
- Check: Qt - Qt 6.8.0 - Sources
- Click "Next"
- Check license checkbox and click "Next"
- Click "Install" button
- Qt 6.8.0 installation used 2.77 GB of disk space and took about 8 minutes
Build 3D Forest
- Download the 3D Forest source code
$ cd /home/user/ $ git clone https://github.com/VUKOZ-OEL/3d-forest.git - Build the 3D Forest project
$ cd /home/user/3d-forest $ mkdir build $ cd /home/user/3d-forest/build $ PATH=$PATH:/home/user/Qt/6.8.0/gcc_64/bin $ cmake -G "Unix Makefiles" .. -DCMAKE_INSTALL_PREFIX=.. -DOpenGL_GL_PREFERENCE=GLVND -DCMAKE_INSTALL_RPATH="/home/user/3d-forest/bin;/home/user/Qt/6.8.0/gcc_64/lib" -DCMAKE_INSTALL_RPATH_USE_LINK_PATH=TRUE $ make $ make install - Start the 3D Forest application
    $ cd /home/user/3d-forest/bin
    $ ./3DForest
Build from Source Code in Mac OS with "Unix Makefiles"
The code uses C++17, CMake, Qt5/Qt6 and OpenGL which will be installed in the following steps. Qt and OpenGL are required only for GUI desktop application.
Install Xcode
- Install Xcode from the App store
- An alternative installation for old macs is described in http://while1.wz.cz/#how-to-install-old-versions-of-mac-os
Install CMake
- Download official "cmake-3.24.0-macos-universal.dmg"
- Copy "CMake.app" to "Applications"
Install Qt
- Download Qt installer from https://www.qt.io/download
- Click "Downloads for open source users" button in "Go open source"
- Click "Download the Qt Online Installer" button in bottom section of the page "Looking for Qt binaries"
- Recommended download was "Qt Online Installer for mac OS"
- Click "Download" button to save file "qt-unified-macOS-x64-4.4.1-online.dmg"
- Run the installer
- Copy "qt-unified-macOS-x64-4.4.1-online" from "qt-unified-macOS-x64-4.4.1-online.dmg"
- Run "qt-unified-macOS-x64-4.4.1-online", it shows "Qt Setup" window
- Enter your Qt Account Email and Password, "Next"
- Check "I have read" and "I am an individual person", "Next", "Next"
- "Preparing meta information download..." may take few minutes
- The default installation directory is "/Users/user/Qt"
- Select "Custom installation", "Next"
- Qt 5 (computers from 2010)
- Unroll Qt tree item and check "Qt 5.15.2" or make your custom installation since doing this may install 31GB of useless stuff.
- For example, check only the following for 10GB installation:
- macOS
- Sources
- Qt Debug Information Files
- Qt Design Studio 3.5.0
- CMake 3.23.2
- Ninja 1.10.2
- "Next", "Install", the installation takes between 10 to 30 minutes
- Click "Finish"
Build 3D Forest
- Open "Terminal" tool from "Applications"
- First clone the repository for example into "Documents/devel" as follows:
cd Documents/devel/ git clone https://github.com/VUKOZ-OEL/3d-forest.git cd 3d-forest - Build source files to executable 3dforest application as follows:
> cd /Users/user/Documents/devel/3d-forest > mkdir build > cd build > /Applications/CMake.app/Contents/bin/cmake -G "Unix Makefiles" .. -DCMAKE_INSTALL_PREFIX=.. -DCMAKE_PREFIX_PATH=/Users/user/Qt/5.15.2/clang_64 -DCMAKE_BUILD_TYPE=Debug -DBUILD_EXAMPLES=ON > make > make install - Run file example:
> cd /Users/user/Documents/devel/3d-forest/bin > DYLD_LIBRARY_PATH=$DYLD_LIBRARY_PATH:/Users/user/Documents/devel/3d-forest/bin ./3DForestExampleFile - The following run.sh scrip can be written to run generated 3DForest.app:
        > install_name_tool -change @rpath/lib3DForestGui.dylib /Users/user/Documents/devel/3d-forest/bin/lib3DForestGui.dylib 3DForest.app/Contents/MacOS/3DForest
        > install_name_tool -change @rpath/lib3DForestEditor.dylib /Users/user/Documents/devel/3d-forest/bin/lib3DForestEditor.dylib 3DForest.app/Contents/MacOS/3DForest
        > install_name_tool -change @rpath/lib3DForestCore.dylib /Users/user/Documents/devel/3d-forest/bin/lib3DForestCore.dylib 3DForest.app/Contents/MacOS/3DForest
        > install_name_tool -change @rpath/QtOpenGL.framework/Versions/5/QtOpenGL /Users/user/Qt/5.15.2/clang_64/lib/QtOpenGL.framework/Versions/5/QtOpenGL 3DForest.app/Contents/MacOS/3DForest
        > install_name_tool -change @rpath/QtWidgets.framework/Versions/5/QtWidgets /Users/user/Qt/5.15.2/clang_64/lib/QtWidgets.framework/Versions/5/QtWidgets 3DForest.app/Contents/MacOS/3DForest
        > install_name_tool -change @rpath/QtGui.framework/Versions/5/QtGui /Users/user/Qt/5.15.2/clang_64/lib/QtGui.framework/Versions/5/QtGui 3DForest.app/Contents/MacOS/3DForest
        > install_name_tool -change @rpath/QtCore.framework/Versions/5/QtCore /Users/user/Qt/5.15.2/clang_64/lib/QtCore.framework/Versions/5/QtCore 3DForest.app/Contents/MacOS/3DForest
        > 3DForest.app/Contents/MacOS/3DForest
      @verbatim
    - Or to run generated executable 3DForest (by changing rpath to abs path):
      @verbatim
        > cd /Users/user/Documents/devel/3d-forest/bin
        > install_name_tool -change @rpath/lib3DForestGui.dylib /Users/user/Documents/devel/3d-forest/bin/lib3DForestGui.dylib 3DForest
        > install_name_tool -change @rpath/lib3DForestEditor.dylib /Users/user/Documents/devel/3d-forest/bin/lib3DForestEditor.dylib 3DForest
        > install_name_tool -change @rpath/lib3DForestCore.dylib /Users/user/Documents/devel/3d-forest/bin/lib3DForestCore.dylib 3DForest
        > install_name_tool -change @rpath/QtOpenGL.framework/Versions/5/QtOpenGL /Users/user/Qt/5.15.2/clang_64/lib/QtOpenGL.framework/Versions/5/QtOpenGL 3DForest
        > install_name_tool -change @rpath/QtWidgets.framework/Versions/5/QtWidgets /Users/user/Qt/5.15.2/clang_64/lib/QtWidgets.framework/Versions/5/QtWidgets 3DForest
        > install_name_tool -change @rpath/QtGui.framework/Versions/5/QtGui /Users/user/Qt/5.15.2/clang_64/lib/QtGui.framework/Versions/5/QtGui 3DForest
        > install_name_tool -change @rpath/QtCore.framework/Versions/5/QtCore /Users/user/Qt/5.15.2/clang_64/lib/QtCore.framework/Versions/5/QtCore 3DForest
        > ./3DForest
Build from Source Code in Windows with "MinGW Makefiles"
The code uses C++17, CMake, Qt5/Qt6 and OpenGL which will be installed in the following steps. Qt and OpenGL are required only for GUI desktop application.
Install git
- Open "Git for windows" https://git-scm.com/downloads
- Download installer Git-2.36.1-64-bit.exe
- Run the installer
- Choose all the options as default recommended values with the following suggestions:
- You may enable "(NEW!) Add a Git Bash Profile to Windows Terminal".
- You may prefer to choose default editor used by Git to "Notepad".
- You may choose default branch name as "main".
- Choose "Checkout as-is, commit as-is" eg. do not convert CRLF/LF (autocrlf = false in global config). This project uses LF line endings. Windows can handle LF just fine at least since version 10.
- Git installer creates global config in "C:/Users/user/AppData/Local/Programs/Git/etc/gitconfig" or "C:/Program Files/Git/etc/".
[diff "astextplain"] textconv = astextplain [filter "lfs"] clean = git-lfs clean -- %f smudge = git-lfs smudge -- %f process = git-lfs filter-process required = true [http] sslBackend = openssl sslCAInfo = C:/Users/user/AppData/Local/Programs/Git/mingw64/ssl/certs/ca-bundle.crt [core] autocrlf = false fscache = true symlinks = false editor = notepad [pull] rebase = false [credential] helper = manager [credential "https://dev.azure.com"] useHttpPath = true [init] defaultBranch = main - For development, setup your git user as follows:
- This creates configuration file in "C:\Users\user\.gitconfig":
$ git config --global user.name "Vaclav Bubnik" $ git config --global user.email "vaclav@email.com" - This creates configuration file in "C:\Users\user\.gitconfig":
            [user]
                email = vaclav@email.com
                name = Vaclav Bubnik
- This creates configuration file in "C:\Users\user\.gitconfig":
Install msys2 and mingw-w64
- Open https://www.msys2.org/ and follow Installation instructions:
- Download the installer: msys2-x86_64-20220319.exe
- Run the installer
- Default installation will create "C:\msys64" installation folder
- Click "Next"
- Choose any "Start Menu shortcuts" and click "Next"
- When complete, check "Run MSYS2 now" and click "Finish"
- Run the following command to update package database
$ pacman -Syu
- MSYS2 window will be closed
- Run "MSYS2 MSYS" from Start menu and update the rest of the packages
$ pacman -Syu
or$ pacman -Su
- Install additional packages
- Install required packages
$ pacman -S mingw-w64-x86_64-clang $ pacman -S mingw-w64-x86_64-cmake $ pacman -S mingw-w64-x86_64-make - Install optional packages to build documentation
$ pacman -S mingw-w64-x86_64-doxygen $ pacman -S mingw-w64-x86_64-graphviz - Install optional packages for python
            $ pacman -S mingw-w64-x86_64-python
            $ pacman -S mingw-w64-x86_64-python-pip
- Install required packages
- Close "MSYS2" window
- Setup Windows PATH variable
- Run "systempropertiesadvanced" from the search box
- Click "Environment Variables"
- In "System variables" select Variable "Path" and click "Edit..."
- Click "New" and add "C:\msys64\usr\bin", hit enter
- Click "New" and add "C:\msys64\usr\local\bin", hit enter
- Click "New" and add "C:\msys64\mingw64\bin", hit enter
- "Move Up" these three new items to top
- Click "Ok"
Install Qt
- Download Qt installer from https://www.qt.io/download
- Click "Downloads for open source users" button in "Go open source" or simply click "Download open source" in "Open source user?" section.
- Click "Download the Qt Online Installer" button in bottom section of the page "Looking for Qt binaries"
- Recommended download was "Qt Online Installer for Windows"
- Click "Download" button to save file "qt-unified-windows-x86-4.3.0-1-online.exe" or "qt-unified-windows-x64-4.6.1-online.exe" if you are doing this in 2024.
- You may need to download an offline installer in a case of network error.
- Run the installer
- Run "qt-unified-windows-x86-4.3.0-1-online.exe", it shows "Qt Setup" window
- Enter your Qt Account Email and Password, "Next"
- Check "I have read" and "I am an individual person", "Next", "Next"
- "Preparing meta information download..." may take few minutes
- It is suggested to keep default installation directory "C:\Qt"
- Select "Custom installation", "Next"
- Qt 6 2022
- Unroll Qt tree item and check "Qt 6.3.0" or make your custom installation since doing this may install 31GB of useless stuff.
- For example, check only the following for 13GB installation:
- MinGW
- Sources
- Qt 5 Compatibility Module
- Additional Libraries
- Qt Debug Information Files
- Qt 5 2000
- Additionally checked: Qt - Qt 5.15.2 - Desktop gcc 64-bit
- Additionally checked: Qt - Qt 5.15.2 - Sources
- "Next", "Install", the installation takes between 10 to 30 minutes
- Click "Finish"
- Run "systempropertiesadvanced" from the search box
- Click "Environment Variables"
- In "System variables" select Variable "Path" and click "Edit..."
- Click "New" and add "C:\Qt\5.15.0\mingw81_64\bin" or "C:\Qt\6.3.0\mingw_64\bin" depending on your installed qt version
Build 3D Forest
- Open "cmd" terminal windows application
- Use "cd" command to navigate to local git repository folder
cd Documents\3d-forest
or first clone the repository to "Documents" as follows:cd Documents git clone https://github.com/VUKOZ-OEL/3d-forest.git cd 3d-forest - Build source files to executable 3dforest application as follows:
> mkdir build > cd build > cmake -G "MinGW Makefiles" .. -DCMAKE_INSTALL_PREFIX=.. > mingw32-make > mingw32-make install - Run 3dforest.exe from directory "Documents\3d-forest\bin"
Development with Visual Studio Code
- See section Edit Source Code with Visual Studio Code
- See section Build and Debug in Visual Studio Code
Build from Source Code in Windows with Visual Studio
The code uses C++17, CMake, Qt5/Qt6 and OpenGL which will be installed in the following steps. Qt and OpenGL are required only for GUI desktop application.
Install git
- Open "Git for windows" https://git-scm.com/downloads
- Download installer Git-2.36.1-64-bit.exe
- Run the installer
- Choose all the options as default recommended values with the following suggestions:
- You may prefer to choose default editor used by Git to "Notepad".
- You may choose default branch name as "main".
- Choose "Checkout as-is, commit as-is" eg. do not convert CRLF/LF (autocrlf = false in global config). This project uses LF line endings. Windows can handle LF just fine at least since version 10.
- Git installer creates global config in "C:/Users/user/AppData/Local/Programs/Git/etc/gitconfig".
[diff "astextplain"] textconv = astextplain [filter "lfs"] clean = git-lfs clean -- %f smudge = git-lfs smudge -- %f process = git-lfs filter-process required = true [http] sslBackend = openssl sslCAInfo = C:/Users/user/AppData/Local/Programs/Git/mingw64/ssl/certs/ca-bundle.crt [core] autocrlf = false fscache = true symlinks = false editor = notepad [pull] rebase = false [credential] helper = manager-core [credential "https://dev.azure.com"] useHttpPath = true [init] defaultBranch = main - For development, setup your git user as follows:
- This creates configuration file in "C:\Users\user\.gitconfig":
$ git config --global user.name "Vaclav Bubnik" $ git config --global user.email "vaclav@email.com" - This creates configuration file in "C:\Users\user\.gitconfig":
            [user]
                email = vaclav@email.com
                name = Vaclav Bubnik
- This creates configuration file in "C:\Users\user\.gitconfig":
Install Visual Studio
- Open https://visualstudio.microsoft.com/downloads/
- Click "Free download" in Visual Studio 2022 Community
- Run VisualStudioSetup.exe
- Select "Desktop development with C++", Total size is 8 GB or 10 GB depending on installer version.
Install Qt
- Download Qt installer from https://www.qt.io/download
- Click "Downloads for open source users" button in "Go open source"
- Click "Download the Qt Online Installer" button in bottom section of the page "Looking for Qt binaries"
- Recommended download was "Qt Online Installer for Windows"
- Click "Download" button to save file "qt-unified-windows-x86-4.3.0-1-online.exe"
- Run the installer
- Run "qt-unified-windows-x86-4.3.0-1-online.exe", it shows "Qt Setup" window
- Enter your Qt Account Email and Password, "Next"
- Check "I have read" and "I am an individual person", "Next", "Next"
- "Preparing meta information download..." may take few minutes
- It is suggested to keep default installation directory "C:\Qt"
- Select "Custom installation", "Next"
- Qt 6 2022
- Unroll Qt tree item and check "Qt 6.3.0" or make your custom installation since doing this may install 31GB of useless stuff.
- For example, check only the following for 13GB installation:
- MSVC
- Sources
- Qt 5 Compatibility Module
- Additional Libraries
- Qt Debug Information Files
- "Next", "Install", the installation takes between 10 to 30 minutes
- Click "Finish"
- Run "systempropertiesadvanced" from the search box
- Click "Environment Variables"
- In "System variables" select Variable "Path" and click "Edit..."
- Click "New" and add "C:\Qt\6.3.0\msvc2019_64\bin"
Build 3D Forest
- Open directory "3d-forest" in Visual Studio. This will automatically create Visual Studio solution from CMake files.
- Change "Select Startup Item" to "3dforest.exe (install) (bin\3dforest.exe)" from the tool bar.
- Click on "3dforest.exe (install) (bin\3dforest.exe)" to build and start 3d Forest.
Add New Functionality
Plugins
There are several ways to add new functionality. The most easy way is to add new external plugin. External plugins are self contained. It is not necessary to touch any file outside of your plugin directory with exception of one cmake file.
- To start, one can copy and modify existing external plugin such as "src/plugins/classification" to new directory "src/plugins/myplugin".
- Add path to "src/plugins/CMakeLists.txt" to build the new plugin:
add_subdirectory(myplugin)
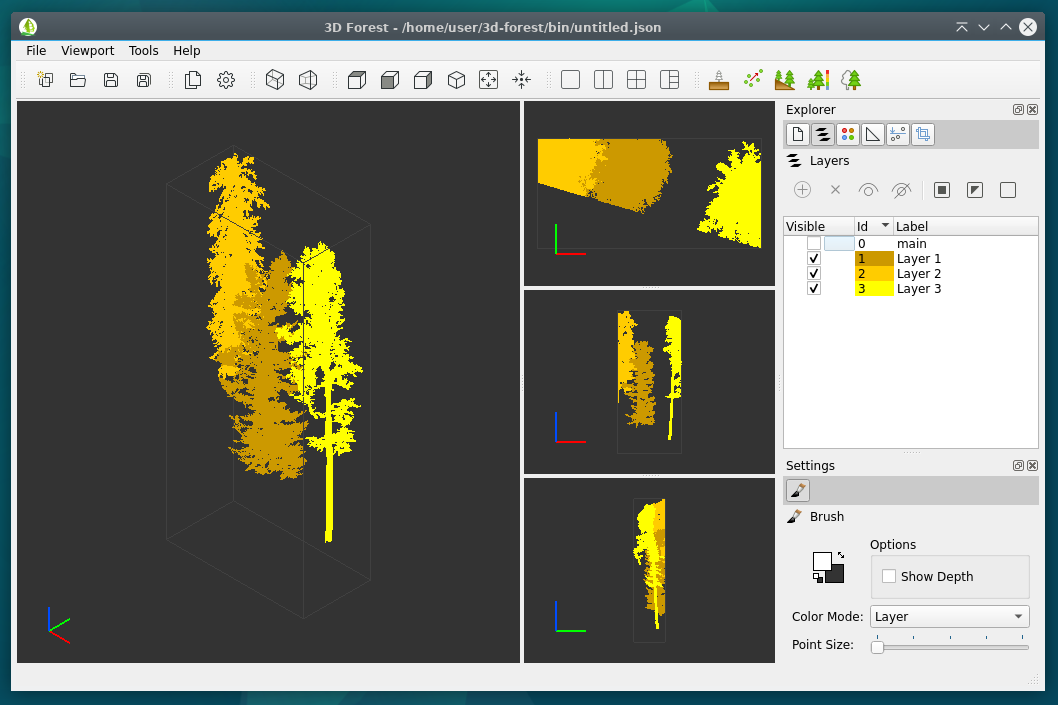
- External plugins will be visible from application main window.
Tools
It is possible to add new command line tool to "src/apps/tools/mytool".
- Example command line tool "src/apps/tools/sandbox".
- Example command line tool with Qt "src/apps/tools/icon".
- Tools are not available from application main window.
Internal Plugins
The third way is to add new internal plugin.
- To start, one can copy and modify existing internal plugin such as "src/plugins/projectfile" to new directory "src/plugins/myplugin".
- Modify "src/gui/CMakeLists.txt" to build the new plugin into core:
file(GLOB_RECURSE SOURCES_MYACTION "../plugins/myplugin/*.cpp") add_library ${SOURCES_MYACTION} ../plugins/myplugin/resources/resources.qrc target_include_directories ../plugins/myplugin - Add field "myPlugin_" to "src/gui/MainWindow.hpp".
class MyPlugin; MyPlugin *myPlugin_; - Create instance in "src/gui/MainWindow.cpp" constructor.
myPlugin_ = new MyPlugin(); myPlugin_->initialize(this); - Internal plugins will be visible from application main window.
Extend Core Functionality
The last and most difficult way is to modify core functionality in the following directories. This functionality is available in all plugins.
- "src/core" build to "lib3dforestcore.dll"
- "src/editor" build to "lib3dforesteditor.dll"
- "src/gui" build to "lib3dforestgui.dll"
General
- The main() 3D Forest application is in "src/apps/3dforest/3dforest.cpp".
- For development with Visual Studio Code, update ".vscode/settings.json" to contain new directories. For example, add "${workspaceRoot}/src/plugins/myaction" to "C_Cpp.default.includePath" include paths.
- Need some icon? Try to look into https://github.com/VUKOZ-OEL/3d-forest-icons
Code Format Suggestions
Automatic Code Formatting
The following command performs automatic code formatting. It is good to run this command before 'git add <file>' and git commit to GitHub:
mingw32-make format
Names
The code is using C++ std on Backend and Qt on Frontend.
Function names follow mixed Qt style and std:
get:
    bool   hasFocus() const;
    bool   isHidden() const;
    int    height() const;
    size_t size() const; // Can be better than Qt like 'count'. std uses 'size'.

get/set:
    bool isSizeGripEnabled() const;     // get
    void setSizeGripEnabled(bool);      // set

    int  result() const;                // get
    void setResult(int i);              // set

    const T &at(int i) const;           // get (inconsistent, easy to read)
    void append(const QList<T> &value); // set (inconsistent, easy to read)

signals:
    void accepted();
    void finished(int result);
    void rejected();
    void toolsRequested(const QString &source);
    void findTextFinished(const QString &text);
    void loadProgress(int progress);
File Names
directory "3rd Party" is "3rdparty" lowercase, no separators

source    "MainWindow.hpp"          C++ header, CamelCase for classes
          "MainWindow.cpp"          C++ source, CamelCase for classes
          "examplecolorpalette.cpp" lowercase for executables
          "las.cpp"                 lowercase for executables

files     anything
          "README.md"
          "CMakeLists.txt"
          "layout_grid_24px.png"
          ".clang-format"
          ".gitignore"
Logging
Example log for file DescriptorPca.cpp
#define LOG_MODULE_NAME "DescriptorPca"
#define LOG_MODULE_DEBUG_ENABLED 1 /* Define to enable all debug log messages from this file. */
#include <Log.hpp>
LOG_DEBUG(<< "Found <" << nPoints << "> points.");
Doxygen
Example command to generate documentation:
mingw32-make doc
Your favorite syntax of documentation comments.
Suggestions:
/** First paragraph is automatically brief

    <detail description>

    @todo Documentation is not complete.
*/

int value; /**< field description, after */

/** Link to function foo() */
/** Link to parameter @e value */
void foo(value);

[in], [out], [in,out] for parameters:
/** @param [in] milliseconds sleep until milliseconds have elapsed. */
void Time::msleep(long milliseconds);

Group 'Point Data' creates hierarchy in generated output:
    /** @name Point Data */
    /**@{*/

    /** Point coordinates. */
    std::vector<double> xyz;

    /** Pulse return magnitude. */
    std::vector<float> intensity;

    /**@}*/

Examples:
/** JSON.

@example
    Json obj;
    obj["name"] = "John";
    std::cout << obj << "\n"; // Output: {"name":"John"}
@endexample
*/

/**
    @section
    @subsection
*/

/** @file Window.hpp */
/** @class Window.cpp::Window

    Documenting another file.
*/
Generate Help Manuals
We would like to be able to give users access to documentation from within the user interface of our application. This section demonstrates how to edit, generate and distribute such documentation with 3D Forest.
These are the locations where it is possible to write the documentation:
- 'User Guide' in directory 'doc\userguide'.
- 'Developer Guide' in directory 'doc\developerguide'.
- Doxygen comments in the source code.
The following steps will generate the documentation and prepare it for distribution:
- The following commands are executed from directory 'build'.
- Doxygen command line tool is used to create manual pages as follows:
mingw32-make doxygen
Produced output: html\index.qhp, html\index.qch - We run 'qhelpgenerator' command to generate qt help with index:
qhelpgenerator ..\doc\index.qhcp -o html\index.qhc
Produced output: html\index.qhc, html\index.qch - We copy '3dforest.qch' and '3dforest.qhc' to 'documentation' directory. These are help files to be shipped with the application:
    mkdir ..\bin\documentation
    copy html\index.qhc ..\bin\documentation\
    copy html\index.qch ..\bin\documentation\
To show the documentation in the application:
- First, we start 3dforest.exe. (Application binary name depends on platform.)
- We access help via 'Help->Manual'.
- The previous step displays Help dialog with table of contents on the left side and relevant html page on the right side.
Adding Third Party Libraries
Third party libraries used by 3D Forest are copied to '3rdparty' directory and therefore distributed together with 3D Forest. 3rd party code is build as a part of 3D Forest build process. This removes inconvenient step which would require to search, download and install dependencies.
GPLv3 compatibility matrix: https://www.gnu.org/licenses/gpl-faq.en.html#AllCompatibility
GPL-Compatible Free Software Licenses: https://www.gnu.org/licenses/license-list.html#GPLCompatibleLicenses
GPL-Incompatible Free Software Licenses: https://www.gnu.org/licenses/license-list.html#GPLIncompatibleLicenses
Cheat Sheet
CMake Build Script
Example Windows build script executed from directory build:
cmake -G "MinGW Makefiles" .. -DCMAKE_INSTALL_PREFIX=.. -DCMAKE_BUILD_TYPE=Debug -DBUILD_EXAMPLES=ON
mingw32-make format
mingw32-make
mingw32-make install
mingw32-make doc
qhelpgenerator ..\doc\index.qhcp -o html\index.qhc
mkdir ..\bin\documentation
copy html\index.qhc ..\bin\documentation\
copy html\index.qch ..\bin\documentation\
Qt Designer
Conversion of '.ui' files to '.hpp' files by using 'uic' command line tool:
which uic
uic -o ui_window.h window.ui
Rename Files
Rename filenames:
powershell -C "gci | % {rni $_.Name ($_.Name -replace '24px', '24')}"
Edit Source Code with Visual Studio Code
- Download and install Visual Studio Code
- For Windows or Linux from https://code.visualstudio.com/
- Linux packages can be installed with: sudo apt install ./<downloaded>.deb
- Tested with version 1.56.2.
- In file explorer, right-click on folder "3d-forest" and select "Open with Code". This will open 3D Forest workspace.
- Install extension "C/C++ IntelliSense, debugging, and code browsing". Extension identifier is "ms-vscode.cpptools". Tested with v1.4.0.
- Install extension "CMake Tools". Extension identifier is "ms-vscode.cmake-tools". Tested with v1.7.3.
- Optionally install extension "CMake langage support for Visual Studio Code". Extension identifier is "twxs.cmake".
- Optionally install extension "Code Spell Checker". Extension identifier is "streetsidesoftware.code-spell-checker".
- On Windows, add the following lines to "3d-forest/.vscode/settings.json" (compiler path and IntelliSense settings):
{ "files.eol": "\n", "C_Cpp.default.includePath":[ "C:/Qt/6.3.0/mingw_64/include/**", "${workspaceRoot}/3rdparty/delaunator", "${workspaceRoot}/3rdparty/eigen", "${workspaceRoot}/3rdparty/libigl/include", "${workspaceRoot}/3rdparty/stb", "${workspaceRoot}/3rdparty/unibnoctree", "${workspaceRoot}/3rdparty/warnings", "${workspaceRoot}/3rdparty/widgets/ctk", "${workspaceRoot}/3rdparty/widgets/flowlayout", "${workspaceRoot}/src/apps/3dforest", "${workspaceRoot}/src/apps/tests", "${workspaceRoot}/src/apps/tools/sandbox", "${workspaceRoot}/src/core", "${workspaceRoot}/src/editor", "${workspaceRoot}/src/gui", "${workspaceRoot}/src/plugins/ComputeClassification", "${workspaceRoot}/src/plugins/ComputeDescriptor", "${workspaceRoot}/src/plugins/ComputeElevation", "${workspaceRoot}/src/plugins/ComputeHeightMap", "${workspaceRoot}/src/plugins/ComputeSegmentationNN", "${workspaceRoot}/src/plugins/ComputeTreeAttributes", "${workspaceRoot}/src/plugins/Edit", "${workspaceRoot}/src/plugins/ExportFile", "${workspaceRoot}/src/plugins/FilterArea", "${workspaceRoot}/src/plugins/FilterClassification", "${workspaceRoot}/src/plugins/FilterDescriptor", "${workspaceRoot}/src/plugins/FilterElevation", "${workspaceRoot}/src/plugins/FilterFiles", "${workspaceRoot}/src/plugins/FilterIntensity", "${workspaceRoot}/src/plugins/FilterTrees", "${workspaceRoot}/src/plugins/Help", "${workspaceRoot}/src/plugins/ImportFile", "${workspaceRoot}/src/plugins/MessageLog", "${workspaceRoot}/src/plugins/ProjectFile", "${workspaceRoot}/src/plugins/SettingsUnits", "${workspaceRoot}/src/plugins/SettingsView", "${workspaceRoot}/src/plugins/TreeTable", "${workspaceRoot}/src/plugins/Viewer" ] } - Close the window and reopen to the same folder to apply new settings.
Build and Debug in Visual Studio Code
- Install GDB for msys2:
- Open windows Command prompt "cmd".
- Search for gdb to find a specific package in the repository: > pacman -Ss gdb
- For example use the following command to install gdb package: > pacman -S mingw-w64-x86_64-gdb
- Open Visual Studio Code
- On Windows, Add the following lines to settings.json:
{ "cmake.configureOnOpen": false, "cmake.mingwSearchDirs": [ "C:\\msys64\\mingw-w64\\bin" ], "cmake.generator": "MinGW Makefiles", } - Select a kit:
- Open the Command Palette.
- Run "CMake: Select a Kit".
- Click "[Scan for kits]".
- Select the compiler. For example "GCC 10.1.0 Using compilers: C= C:\msys64\mingw-w64\bin\gcc.exe, CXX= C:\msys64\mingw-w64\bin\g++.exe".
- Select a variant:
- Open the Command Palette.
- Run "CMake: Select Variant".
- Select "Debug" to include debug information with your build.
- On Windows, create 'launch.json' (debugger settings, perform CMake build) in '.vscode' directory:
{ "version": "0.2.0", "configurations": [ { "name": "(gdb) Launch", "type": "cppdbg", "request": "launch", "program": "${workspaceFolder}/3dforest.exe", "args": [], "stopAtEntry": false, "cwd": "${workspaceFolder}", "environment": [], "externalConsole": false, "MIMode": "gdb", "setupCommands": [ { "description": "Enable pretty-printing for gdb", "text": "-enable-pretty-printing", "ignoreFailures": true } ] } ] } - You may also create file 'tasks.json' (build instructions) in '.vscode' directory:
{ "version": "2.0.0", "command": "sh", "args": ["-c"], "presentation": { "echo": true, "reveal": "always", "focus": true, "panel": "new" }, "tasks": [ { "label": "cmake", "type": "shell", "options": { "cwd": "${workspaceRoot}/build" }, "args": ["cmake -G 'MinGW Makefiles' .. -DCMAKE_INSTALL_PREFIX=.."] }, { "label": "make", "type": "shell", "args": ["mingw32-make"], "options": {"cwd": "${workspaceRoot}/build"}, "dependsOn": ["cmake"], "group": {"kind": "build","isDefault": true} } ] } - To build click "Build the selected target".
- Copy shared libraries to the same folder as "3dforest.exe": build\src\apps\3dforest\
- lib3dforestcore.dll
- lib3dforesteditor.dll
- lib3dforestgui.dll
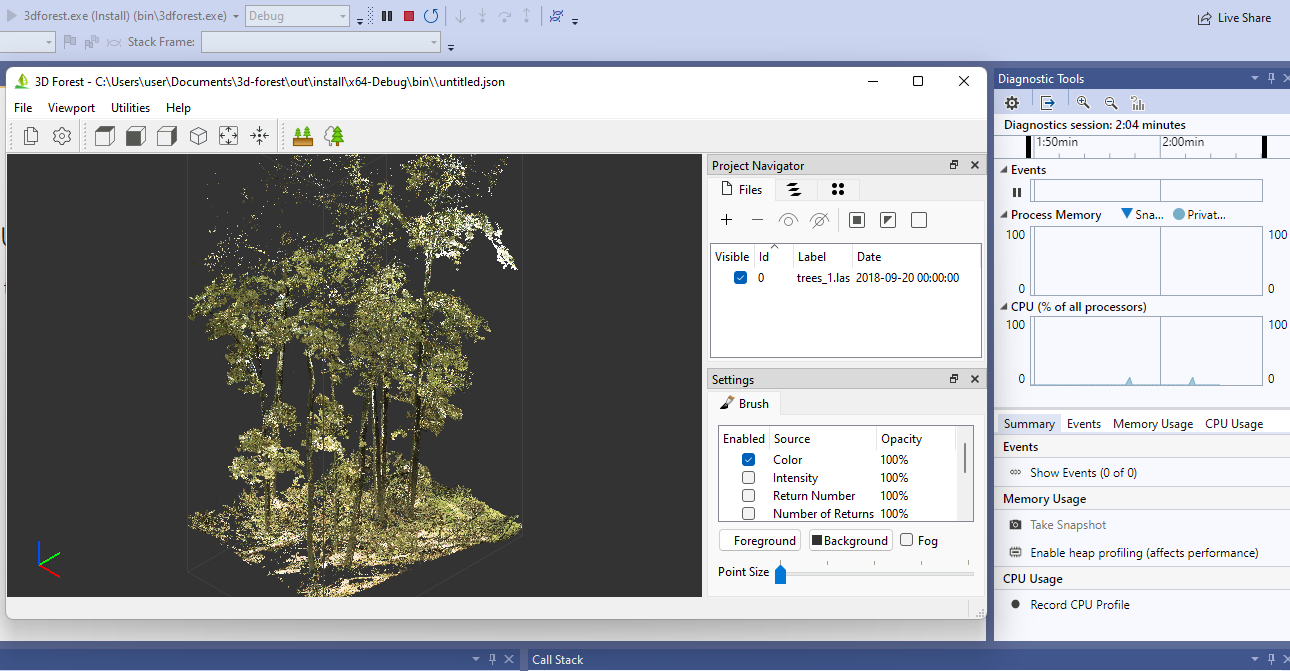
- To debug click "Launch the debugger for the selected target: [3dforest]".